19 Conveniences That Till Make You Great In The Laravel Ecosystem
1- Laravel Breeze

Laravel Breeze is a brand new package released by Taylor and the Laravel team:
Breeze provides a minimal and simple starting point for building a Laravel application with authentication. Styled with Tailwind, Breeze publishes authentication controllers and views to your application that can be easily customized based on your own application’s needs.
To get started using Breeze all you need to do is create a new Laravel app and then run:
composer require laravel/breezephp artisan breeze:install
2- Laravel Cashier (Stripe)
Laravel Cashier provides an expressive, fluent interface to Stripe’s and Braintree’s subscription billing services. It handles almost all of the boilerplate subscription billing code you are dreading writing. In addition to basic subscription management, Cashier can handle coupons, swapping subscription, subscription “quantities”, cancellation grace periods, and even generate invoice PDFs.
composer require "laravel/cashier":"~7.0"3- Laravel Dusk
Laravel Dusk provides an expressive, easy-to-use browser automation and testing API. By default, Dusk does not require you to install JDK or Selenium on your local computer. Instead, Dusk uses a standalone ChromeDriver installation. However, you are free to utilize any other Selenium compatible driver you wish.
To get started, you should install Google Chrome and add the laravel/dusk Composer dependency to your project:
composer require --dev laravel/dusk4- Laravel Broadcasting
In many modern web applications, WebSockets are used to implement realtime, live-updating user interfaces. When some data is updated on the server, a message is typically sent over a WebSocket connection to be handled by the client. WebSockets provide a more efficient alternative to continually polling your application’s server for data changes that should be reflected in your UI.
For example, imagine your application is able to export a user’s data to a CSV file and email it to them. However, creating this CSV file takes several minutes so you choose to create and mail the CSV within a queued job. When the CSV has been created and mailed to the user, we can use event broadcasting to dispatch a App\Events\UserDataExported event that is received by our application's JavaScript. Once the event is received, we can display a message to the user that their CSV has been emailed to them without them ever needing to refresh the page.
To assist you in building these types of features, Laravel makes it easy to “broadcast” your server-side Laravel events over a WebSocket connection. Broadcasting your Laravel events allows you to share the same event names and data between your server-side Laravel application and your client-side JavaScript application.
The core concepts behind broadcasting are simple: clients connect to named channels on the frontend, while your Laravel application broadcasts events to these channels on the backend. These events can contain any additional data you wish to make available to the frontend.
Supported Drivers
By default, Laravel includes two server-side broadcasting drivers for you to choose from: Pusher Channels and Ably. However, community driven packages such as laravel-websockets and soketi provide additional broadcasting drivers that do not require commercial broadcasting providers.
Pusher Channels
If you plan to broadcast your events using Pusher Channels, you should install the Pusher Channels PHP SDK using the Composer package manager:
composer require pusher/pusher-php-server5- Envoyer

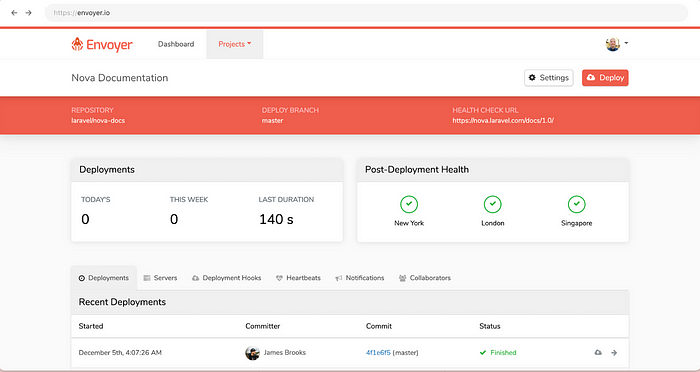
What Is Envoyer?
Laravel Envoyer is a zero downtime deployment service for PHP. Some highlights of Envoyer’s features include:
- GitHub, GitLab & Bitbucket Integration
- GitLab Self-Hosted Integration
- Seamless Deployment Rollbacks
- Application Health Checks
- Integrated Chat Notifications
- Tuned for Laravel Apps
- Deploy Any PHP Project
- Unlimited Deployments
- Deploy To Multiple Servers
- Cron Job Monitoring
- Unlimited Team Members
- Customize Your Deployments
- Import Your Laravel Forge Servers
#Learning More
Laracasts has a comprehensive and free video course on Envoyer. Feel free to review this course if you are new to Laravel Envoyer and want a video overview of its features.
6- Forge
Laravel Forge is a server management and site deployment service. After connecting to your preferred server provider, Forge will provision a new server, installing and configuring: Nginx. PHP. MySQL / Postgres / MariaDB

7- Horizon

Before digging into Laravel Horizon, you should familiarize yourself with Laravel’s base queue services. Horizon augments Laravel’s queue with additional features that may be confusing if you are not already familiar with the basic queue features offered by Laravel.
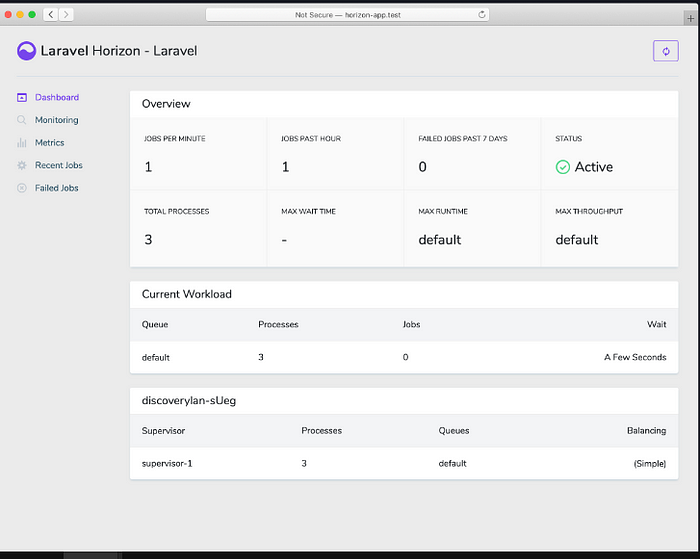
Laravel Horizon provides a beautiful dashboard and code-driven configuration for your Laravel powered Redis queues. Horizon allows you to easily monitor key metrics of your queue system such as job throughput, runtime, and job failures.
When using Horizon, all of your queue worker configuration is stored in a single, simple configuration file. By defining your application’s worker configuration in a version controlled file, you may easily scale or modify your application’s queue workers when deploying your application.
You may install Horizon into your project using the Composer package manager:
composer require laravel/horizonAfter installing Horizon, publish its assets using the horizon:install Artisan command:
php artisan horizon:install8- Laravel Jetstream

Laravel Jetstream is a beautifully designed application starter kit for Laravel and provides the perfect starting point for your next Laravel application. Jetstream provides the implementation for your application’s login, registration, email verification, two-factor authentication, session management, API via Laravel Sanctum, and optional team management features.
Jetstream is designed using Tailwind CSS and offers your choice of Livewire or Inertia scaffolding.
You may use Composer to install Jetstream into your new Laravel project:
composer require laravel/jetstreamAfter installing the Jetstream package, you may execute the jetstream:install Artisan command. This command accepts the name of the stack you prefer (livewire or inertia). In addition, you may use the --teams switch to enable team support.
9- Laravel Mix
Laravel Mix, a package developed by Laracasts creator Jeffrey Way, provides a fluent API for defining webpack build steps for your Laravel application using several common CSS and JavaScript pre-processors.
In other words, Mix makes it a cinch to compile and minify your application’s CSS and JavaScript files. Through simple method chaining, you can fluently define your asset pipeline. For example:
mix.js('resources/js/app.js', 'public/js').postCss('resources/css/app.css', 'public/css');
If you’ve ever been confused and overwhelmed about getting started with webpack and asset compilation, you will love Laravel Mix. However, you are not required to use it while developing your application; you are free to use any asset pipeline tool you wish, or even none at all.
If you need a head start building your application with Laravel and Tailwind CSS, check out one of our application starter kits.
Installation & Setup
Installing Node
Before running Mix, you must first ensure that Node.js and NPM are installed on your machine:
node -vnpm -v
You can easily install the latest version of Node and NPM using simple graphical installers from the official Node website. Or, if you are using Laravel Sail, you may invoke Node and NPM through Sail:
./vendor/bin/sail node -v./vendor/bin/sail npm -v
Installing Laravel Mix
The only remaining step is to install Laravel Mix. Within a fresh installation of Laravel, you’ll find a package.json file in the root of your directory structure. The default package.json file already includes everything you need to get started using Laravel Mix. Think of this file like your composer.json file, except it defines Node dependencies instead of PHP dependencies. You may install the dependencies it references by running:
npm installRunning Mix
Mix is a configuration layer on top of webpack, so to run your Mix tasks you only need to execute one of the NPM scripts that are included in the default Laravel package.json file. When you run the dev or production scripts, all of your application's CSS and JavaScript assets will be compiled and placed in your application's public directory:
// Run all Mix tasks...npm run dev// Run all Mix tasks and minify output...npm run prod
Watching Assets For Changes
The npm run watch command will continue running in your terminal and watch all relevant CSS and JavaScript files for changes. Webpack will automatically recompile your assets when it detects a change to one of these files:
npm run watchWebpack may not be able to detect your file changes in certain local development environments. If this is the case on your system, consider using the watch-poll command:
npm run watch-poll10- Laravel Sail
Laravel Sail is a light-weight command-line interface for interacting with Laravel’s default Docker development environment. Sail provides a great starting point for building a Laravel application using PHP, MySQL, and Redis without requiring prior Docker experience.
At its heart, Sail is the docker-compose.yml file and the sail script that is stored at the root of your project. The sail script provides a CLI with convenient methods for interacting with the Docker containers defined by the docker-compose.yml file.
Laravel Sail is supported on macOS, Linux, and Windows (via WSL2).
Installation & Setup
Laravel Sail is automatically installed with all new Laravel applications so you may start using it immediately. To learn how to create a new Laravel application, please consult Laravel’s installation documentation for your operating system. During installation, you will be asked to choose which Sail supported services your application will be interacting with.
Installing Sail Into Existing Applications
If you are interested in using Sail with an existing Laravel application, you may simply install Sail using the Composer package manager. Of course, these steps assume that your existing local development environment allows you to install Composer dependencies:
composer require laravel/sail --devAfter Sail has been installed, you may run the sail:install Artisan command. This command will publish Sail's docker-compose.yml file to the root of your application:
php artisan sail:installFinally, you may start Sail. To continue learning how to use Sail, please continue reading the remainder of this documentation:
./vendor/bin/sail upUsing Devcontainers
If you would like to develop within a Devcontainer, you may provide the --devcontainer option to the sail:install command. The --devcontainer option will instruct the sail:install command to publish a default .devcontainer/devcontainer.json file to the root of your application:
php artisan sail:install --devcontainer11- Laravel Octane
Laravel Octane supercharges your application’s performance by serving your application using high-powered application servers, including Open Swoole, Swoole, and RoadRunner. Octane boots your application once, keeps it in memory, and then feeds it requests at supersonic speeds.
Installation
Octane may be installed via the Composer package manager:
composer require laravel/octaneAfter installing Octane, you may execute the octane:install Artisan command, which will install Octane's configuration file into your application:
php artisan octane:install12- Laravel Nova

Laravel Nova is a new tool in the line of Laravel Spark, Laravel Cashier, and Laravel Passport that you can pull into your Laravel apps. It’s not available for purchase yet, but will be in about a month.
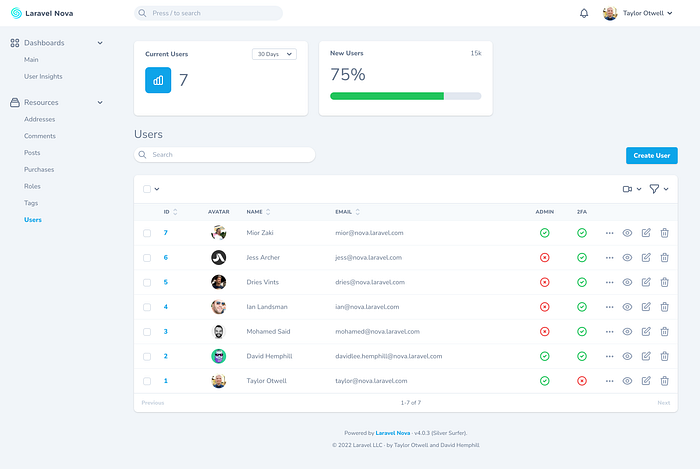
Nova is an admin panel tool. It’s not an admin panel generator; it’s not generating files that you then need to modify. And it’s not a CMS; many of the features you expect from CMSes don’t come out of the box, but it’s also endlessly more flexible and developer-focused than CMSes. So the best way to describe it is as an admin panel tool, but it’s definitely head and shoulders above everything else that exists in this space.
You’re going to use Nova to build administrative dashboards for your apps. But Nova is not necessarily a part of your app (entangled, as Taylor put it) like Spark was. Rather, it’s a standalone product that allows you to build super quick management tooling around your data. You do pull it into your codebase as a package, but you don’t have to touch your existing code at all. It does have the ability for you to modify it enough to allow different types of users to log in, so you could actually build some relatively simple SaaSes purely with Nova; but most people will have a Laravel codebase that is entirely separate from Nova, and use Nova to build the admin panel at a URL something like myapp.com/nova.
I haven’t run this by Taylor, but I would say that, in theory, you could build Nova-based admin panels for non-Laravel apps. All it needs is Eloquent models and access to your database (and, if you want to share users with your other app, you have to make them able to share password hashing algorithms). So if you have, for example, a Rails app that you’re using Sequel Pro to administer, you could throw up a Laravel app with only Nova installed on a subdomain of your app, build Eloquent models for the Rails database tables, and then administer the same data with Nova.
13- Laravel Sanctum
Laravel Sanctum provides a featherweight authentication system for SPAs (single page applications), mobile applications, and simple, token based APIs. Sanctum allows each user of your application to generate multiple API tokens for their account. These tokens may be granted abilities / scopes which specify which actions the tokens are allowed to perform.
How It Works
Laravel Sanctum exists to solve two separate problems. Let’s discuss each before digging deeper into the library.
API Tokens
First, Sanctum is a simple package you may use to issue API tokens to your users without the complication of OAuth. This feature is inspired by GitHub and other applications which issue “personal access tokens”. For example, imagine the “account settings” of your application has a screen where a user may generate an API token for their account. You may use Sanctum to generate and manage those tokens. These tokens typically have a very long expiration time (years), but may be manually revoked by the user at anytime.
Laravel Sanctum offers this feature by storing user API tokens in a single database table and authenticating incoming HTTP requests via the Authorization header which should contain a valid API token.
SPA Authentication
Second, Sanctum exists to offer a simple way to authenticate single page applications (SPAs) that need to communicate with a Laravel powered API. These SPAs might exist in the same repository as your Laravel application or might be an entirely separate repository, such as a SPA created using Vue CLI or a Next.js application.
For this feature, Sanctum does not use tokens of any kind. Instead, Sanctum uses Laravel’s built-in cookie based session authentication services. Typically, Sanctum utilizes Laravel’s web authentication guard to accomplish this. This provides the benefits of CSRF protection, session authentication, as well as protects against leakage of the authentication credentials via XSS.
Sanctum will only attempt to authenticate using cookies when the incoming request originates from your own SPA frontend. When Sanctum examines an incoming HTTP request, it will first check for an authentication cookie and, if none is present, Sanctum will then examine the Authorization header for a valid API token.
It is perfectly fine to use Sanctum only for API token authentication or only for SPA authentication. Just because you use Sanctum does not mean you are required to use both features it offers.
Installation
The most recent versions of Laravel already include Laravel Sanctum. However, if your application’s
composer.jsonfile does not includelaravel/sanctum, you may follow the installation instructions below.
You may install Laravel Sanctum via the Composer package manager:
composer require laravel/sanctumNext, you should publish the Sanctum configuration and migration files using the vendor:publish Artisan command. The sanctum configuration file will be placed in your application's config directory:
php artisan vendor:publish --provider="Laravel\Sanctum\SanctumServiceProvider"Finally, you should run your database migrations. Sanctum will create one database table in which to store API tokens:
php artisan migrateNext, if you plan to utilize Sanctum to authenticate an SPA, you should add Sanctum’s middleware to your api middleware group within your application's app/Http/Kernel.php file:
'api' => [\Laravel\Sanctum\Http\Middleware\EnsureFrontendRequestsAreStateful::class,'throttle:api',\Illuminate\Routing\Middleware\SubstituteBindings::class,],
Migration Customization
If you are not going to use Sanctum’s default migrations, you should call the Sanctum::ignoreMigrations method in the register method of your App\Providers\AppServiceProvider class. You may export the default migrations by executing the following command: php artisan vendor:publish --tag=sanctum-migrations
14- Laravel Scout
Laravel Scout provides a simple, driver based solution for adding full-text search to your Eloquent models. Using model observers, Scout will automatically keep your search indexes in sync with your Eloquent records.
Currently, Scout ships with Algolia, MeiliSearch, and MySQL / PostgreSQL (database) drivers. In addition, Scout includes a "collection" driver that is designed for local development usage and does not require any external dependencies or third-party services. Furthermore, writing custom drivers is simple and you are free to extend Scout with your own search implementations.
Installation
First, install Scout via the Composer package manager:
composer require laravel/scoutAfter installing Scout, you should publish the Scout configuration file using the vendor:publish Artisan command. This command will publish the scout.php configuration file to your application's config directory:
php artisan vendor:publish --provider="Laravel\Scout\ScoutServiceProvider"Finally, add the Laravel\Scout\Searchable trait to the model you would like to make searchable. This trait will register a model observer that will automatically keep the model in sync with your search driver:
<?phpnamespace App\Models;use Illuminate\Database\Eloquent\Model;use Laravel\Scout\Searchable;class Post extends Model{use Searchable;}
15- Laravel Socialite
In addition to typical, form based authentication, Laravel also provides a simple, convenient way to authenticate with OAuth providers using Laravel Socialite. Socialite currently supports authentication via Facebook, Twitter, LinkedIn, Google, GitHub, GitLab, and Bitbucket.
Adapters for other platforms are available via the community driven Socialite Providers website.
Installation
To get started with Socialite, use the Composer package manager to add the package to your project’s dependencies:
composer require laravel/socialite16- Laravel Valet
Laravel Valet is a development environment for macOS minimalists. Laravel Valet configures your Mac to always run Nginx in the background when your machine starts. Then, using DnsMasq, Valet proxies all requests on the *.test domain to point to sites installed on your local machine.
In other words, Valet is a blazing fast Laravel development environment that uses roughly 7 MB of RAM. Valet isn’t a complete replacement for Sail or Homestead, but provides a great alternative if you want flexible basics, prefer extreme speed, or are working on a machine with a limited amount of RAM.
Out of the box, Valet support includes, but is not limited to:
- Laravel
- Bedrock
- CakePHP 3
- Concrete5
- Contao
- Craft
- Drupal
- ExpressionEngine
- Jigsaw
- Joomla
- Katana
- Kirby
- Magento
- OctoberCMS
- Sculpin
- Slim
- Statamic
- Static HTML
- Symfony
- WordPress
- Zend
However, you may extend Valet with your own custom drivers.
Installation
Valet requires macOS and Homebrew. Before installation, you should make sure that no other programs such as Apache or Nginx are binding to your local machine’s port 80.
To get started, you first need to ensure that Homebrew is up to date using the update command:
brew updateNext, you should use Homebrew to install PHP:
brew install phpAfter installing PHP, you are ready to install the Composer package manager. In addition, you should make sure the ~/.composer/vendor/bin directory is in your system's "PATH". After Composer has been installed, you may install Laravel Valet as a global Composer package:
composer global require laravel/valetFinally, you may execute Valet’s install command. This will configure and install Valet and DnsMasq. In addition, the daemons Valet depends on will be configured to launch when your system starts:
valet installOnce Valet is installed, try pinging any *.test domain on your terminal using a command such as ping foobar.test. If Valet is installed correctly you should see this domain responding on 127.0.0.1.
Valet will automatically start its required services each time your machine boots.
17- Laravel Telescope
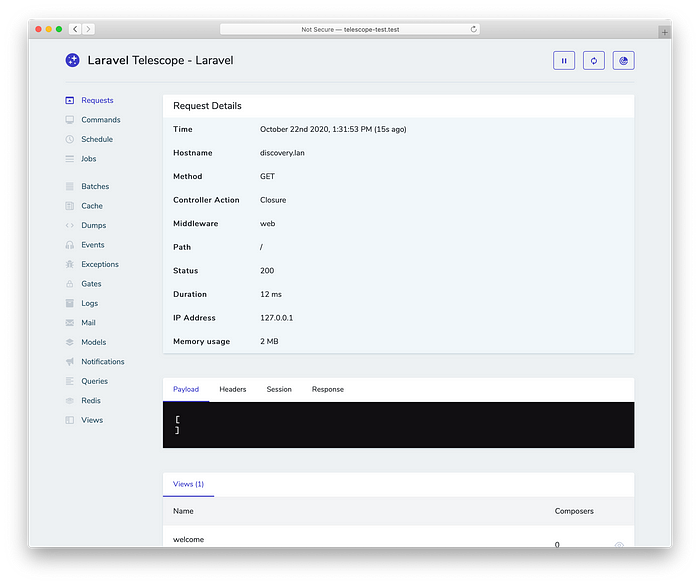
Laravel Telescope makes a wonderful companion to your local Laravel development environment. Telescope provides insight into the requests coming into your application, exceptions, log entries, database queries, queued jobs, mail, notifications, cache operations, scheduled tasks, variable dumps, and more.

Installation
You may use the Composer package manager to install Telescope into your Laravel project:
composer require laravel/telescopeAfter installing Telescope, publish its assets using the telescope:install Artisan command. After installing Telescope, you should also run the migrate command in order to create the tables needed to store Telescope's data:
php artisan telescope:installphp artisan migrate
18- Laravel Spark
Laravel Spark is the perfect starting point for your next big idea. When combined with a Laravel application starter kit like Laravel Jetstream (opens new window)or Laravel Breeze (opens new window), or the frontend of your choice, Spark provides a well-designed billing management panel for your application. Spark, which is built on the power of Laravel Cashier (opens new window), allows your customers to subscribe to monthly or yearly billing plans, manage their payment method, update their subscription plans, and download their receipts all from a self-contained, beautifully designed billing portal.
19- Laravel Vapor
Laravel Vapor is an auto-scaling, serverless deployment platform for Laravel, powered by AWS Lambda. Manage your Laravel infrastructure on Vapor and fall in love with the scalability and simplicity of serverless.
Vapor abstracts the complexity of managing Laravel applications on AWS Lambda, as well as interfacing those applications with SQS queues, databases, Redis clusters, networks, CloudFront CDN, and more. Some highlights of Vapor’s features include:
- Auto-scaling web / queue infrastructure fine tuned for Laravel
- Zero-downtime deployments and rollbacks
- Environment variable / secret management
- Database management, including point-in-time restores and scaling
- Redis Cache management, including cluster scaling
- Database and cache tunnels, allowing for easy local inspection
- Automatic uploading of assets to Cloudfront CDN during deployment
- Unique, Vapor assigned vanity URLs for each environment, allowing immediate inspection
- Custom application domains
- DNS management
- Certificate management and renewal
- Application, database, and cache metrics
- CI friendly
